To download the trial version of EasyXLS Excel Library, press the below button:
If you already own a license key, you may login and download EasyXLS from your account.
Install the downloaded EasyXLS installer for v8.6 or earlier.
Step 2: License file setup
Step required for EasyXLS v9.0 or later.
If you are using a trial, generate a trial license file from EasyXLS trials page. The trial license is valid for 30-days.
If you own a license key, you may login to the account that purchased the license and generate the license file from: https://www.easyxls.com/my-orders
Setup the license file into your project using these guidelines.
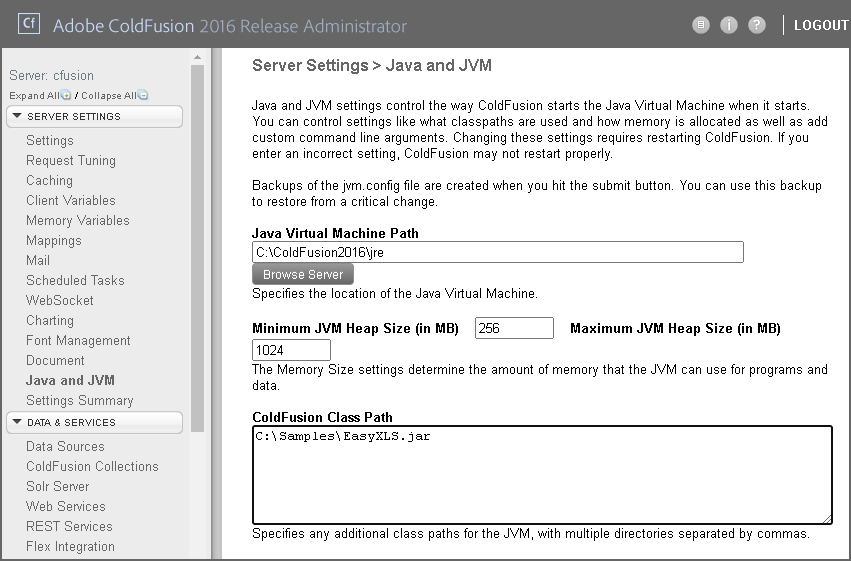
Step 3: Add EasyXLS library to CLASSPATH in ColdFusion Administator
EasyXLS.jar must be included to class path for Java runtime environment.
EasyXLS.jar can be found: - Inside the downloaded archive at Step 1 for EasyXLS v9.0 or later - Under installation path for EasyXLS v8.6 or earlier, in "Lib" folder.
Another solution is to add EasyXLS.jar to "lib" folder from ColdFusion installation path.
Step 4: Run ColdFusion code that creates Excel file
Execute the following ColdFusion code that creates Excel file programmatically.
<!--
==============================================================
Tutorial 03
This tutorial shows how to create an Excel file that has
multiple sheets in ColdFusion. The created Excel file is
empty and the next tutorial shows how to add data into sheets.
==============================================================
-->
Tutorial 03<br>
----------<br><!-- Create an instance of the class that creates Excel files --><cfobject type="java"class="EasyXLS.ExcelDocument"name="workbook"action="CREATE"><!-- Create two sheets --><cfset ret = workbook.easy_addWorksheet("First tab")><cfset ret = workbook.easy_addWorksheet("Second tab")><!-- Create Excel file -->
Writing file C:\Samples\Tutorial03 - create Excel file.xlsx<br><cfset ret = workbook.easy_WriteXLSXFile("C:\Samples\Tutorial03 - create Excel file.xlsx")><!-- Confirm the creation of Excel file --><cfset sError = workbook.easy_getError()><cfif (sError is "")><cfoutput>
File successfully created.
</cfoutput><cfelse><cfoutput>
Error encountered: #sError#
</cfoutput></cfif><!-- Dispose memory --><cfset workbook.Dispose()>